

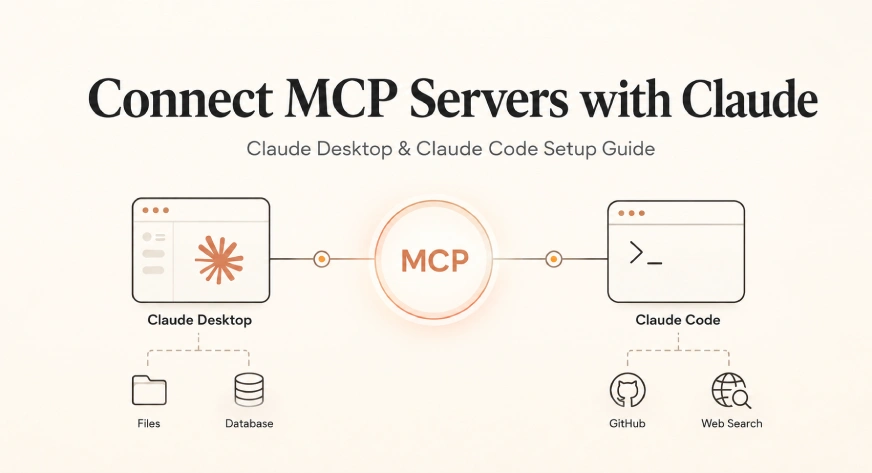

Connecting MCP servers to Claude allows it to work with external tools, files, databases, repositories, and other systems instead of operating only within the chat window. The setup differs slightly between Claude Desktop and Claude Code, but both can be configured in just a few steps.
In this article, you’ll learn how to connect MCP servers with Claude Desktop and Claude Code, a practical step-by-step guide for getting each setup running correctly.
What Is MCP and Why Does It Matter?
MCP (Model Context Protocol) is the universal connector layer that lets any AI model talk to any external tool through a single standardised interface without custom integration code for every combination.
Before MCP, connecting Claude to GitHub required one custom integration. Connecting it to Slack required a different one. Connecting it to your database required a third. Anthropic called this the “N×M problem”: N AI models times M external tools meant N×M bespoke connectors. MCP solves it by turning that into N+M. Build one MCP server for GitHub, and every MCP-compatible AI client Claude, Cursor, Windsurf, and dozens more can use it immediately.
How MCP Works in 3 Simple Parts
Understanding the 3-part architecture takes 2 minutes and prevents 90% of setup confusion.
| Component | What It Is | Example in Claude |
|---|---|---|
| Host | The AI app the user talks to, manages context, security, and which servers are available. | Claude Desktop, Claude Code, Cursor |
| Client | Lives inside the host. Handles protocol-level communication with each MCP server. | Built into Claude Desktop / Claude Code |
| Server | An external process that exposes tools, resources, or prompts to the AI via MCP. | GitHub MCP server, Filesystem MCP server |
When you ask Claude to “check my open GitHub PRs”, here is what happens behind the scenes:
- Claude identifies it needs an external tool to fulfil the request.
- The MCP client in Claude sends a JSON-RPC request to the GitHub MCP server.
- The server queries GitHub’s API and returns structured data.
- Claude incorporates that data into its context and generates your answer.
The whole flow takes under a second. You never see the plumbing.
As of April 2026, Streamable HTTP is Anthropic’s official recommended transport, and the older SSE transport is being deprecated.
Claude Desktop: Step-by-Step MCP Setup
Claude Desktop reads its MCP configuration from a single JSON file. There are two ways to install servers: the new one-click Desktop Extensions (.mcpb files, formerly .dxt) and the traditional JSON config method. Use Extensions for supported servers; use JSON config for anything custom.
Method 1: Desktop Extensions (One-Click, No JSON)
As of early 2026, Claude Desktop supports Desktop Extensions, pre-packaged MCP servers distributed as .mcpb files (MCP Bundle; older guides may call these .dxt files, which still work but are the legacy name). These install with a double-click. No JSON editing, no Node.js PATH issues.
- Open Claude Desktop.
- Click the “+” button in the bottom-left of the chat input.
- Select “Connectors” to open the connectors menu.
- Find your server (e.g., GitHub, Google Drive) and click Install (or Click onn add connectors to find one on the connectors directory).
- Restart Claude Desktop. The server activates automatically.

Desktop Extensions are the right choice for non-technical users or servers you want to “set and forget.” The JSON config method below is right for custom servers, private servers, or full control over arguments and environment variables.
Method 2: JSON Config (Full Control)
Claude Desktop reads its MCP configuration from claude_desktop_config.json. The file location depends on your OS:
macOS: ~/Library/Application Support/Claude/claude_desktop_config.json
Windows: %APPDATA%\Claude\claude_desktop_config.json
On Windows, which folder actually has this file depends on how you installed Claude Desktop, and this trips up a lot of people. There are two completely different locations:
- Direct .exe installer (from claude.ai/downloads):
%APPDATA%\Claude\claude_desktop_config.json - Microsoft Store, WinGet, or MSIX install:
%LOCALAPPDATA%\Packages\Claude_pzs8sxrjxfjjc\LocalCache\Roaming\Claude\claude_desktop_config.json
If %APPDATA%\Claude doesn’t exist on your machine, you almost certainly have the Store/MSIX install, and your real file is at that second, uglier path. Windows’ app-packaging model silently redirects it there instead of the standard location every piece of documentation assumes.
If neither path has the file yet, open Claude Desktop itself, go to Settings → Developer → Edit Config. That creates the file at whichever path your specific install actually uses, so you don’t have to guess.
One Windows-specific trap: paths inside JSON need double backslashes. C:\Users\yourname\Documents in a JSON string must be written as C:\\Users\\yourname\\Documents, a single backslash breaks the JSON parser. Here’s what a complete, correctly escaped config looks like:

Editing the Config File
Open Claude Desktop → top menu bar → Settings → Developer → Edit Config. This opens the file in your default editor and creates it if it does not exist.
The file has just one top-level key, mcpServers. Think of it as a list of servers you want Claude to know about. Each server gets its own entry inside that list, and you pick whatever name you want for that entry (like “filesystem” or “github” below).
Inside each server’s entry, there are three things you can set:
- command: the actual program Claude runs to start that server (usually npx, since most servers are distributed as npm packages)
- args: the list of arguments passed to that command, exactly like you’d type them in a terminal
- env: any environment variables the server needs, most commonly API keys or access tokens
Here’s a practical starter config for a developer workflow: filesystem access, GitHub integration, and web search:
{
  "mcpServers": {
    "filesystem": {
      "command": "/usr/local/bin/npx",
      "args": ["-y", "@modelcontextprotocol/server-filesystem",
               "/Users/yourname/Documents", "/Users/yourname/projects"]
    },
    "github": {
      "command": "/usr/local/bin/npx",
      "args": ["-y", "@modelcontextprotocol/server-github"],
      "env": {
        "GITHUB_PERSONAL_ACCESS_TOKEN": "ghp_your_token_here"
      }
    },
    "brave-search": {
      "command": "/usr/local/bin/npx",
      "args": ["-y", "@modelcontextprotocol/server-brave-search"],
      "env": { "BRAVE_API_KEY": "your_brave_api_key" }
    }
  }
}
What’s happening in each of the three servers:
filesystem doesn’t need any credentials, so it only has command and args. The args list tells npx which package to run (@modelcontextprotocol/server-filesystem) and which folders on your computer it’s allowed to touch, in this case Documents and projects.
github needs to prove who you are to GitHub’s API, so it has an extra env block. GITHUB_PERSONAL_ACCESS_TOKEN is where you paste your own GitHub token. The server reads it as an environment variable when it starts up, the same way a program run from your terminal would.
Getting a GitHub token, step by step:
- Go to github.com and sign in. Click your profile photo in the top-right corner, then click Settings.
- In the left sidebar, click Developer settings (it’s near the bottom).
- Click Personal access tokens, then Fine-grained tokens, then Generate new token. GitHub now recommends fine-grained tokens over the older “classic” ones, since you can limit them to specific repos instead of your whole account.
- Give it a Token name (anything memorable, like “claude-mcp”), and set an Expiration. GitHub warns against “no expiration” for good reason, pick 90 days and put a renewal reminder on your calendar.
- Under Resource owner, pick your personal account (or the organization whose repos you need). Under Repository access, choose Only select repositories and pick just the ones Claude actually needs, not all of them.
- Under Permissions, grant only what you’ll use. For most workflows, Contents (read and write) and Issues (read and write) cover it. Add Pull requests (read and write) if you want Claude opening or reviewing PRs.
- Click Generate token at the bottom, then copy it immediately. GitHub shows a fine-grained token exactly once, if you navigate away before copying it, you’ll have to generate a new one.
That token (it starts with github_pat_) is what goes in place of “ghp_your_token_here” in the JSON config above:
"GITHUB_PERSONAL_ACCESS_TOKEN": "github_pat_your_actual_token"brave-search follows the same pattern as github: one command, one args list to run the right package, and one env variable for its API key.
That’s the whole pattern. Every server you ever add to this file follows the same shape: a name you choose, a command to run it, arguments to configure it, and (if it needs to authenticate) an env block for its secrets.
Claude Code: Adding MCP Servers via CLI
Claude Code has its own MCP configuration surface separate from Claude Desktop, and it comes with a dedicated CLI command that makes setup faster than editing JSON manually.
You can install Claude Code following this guide: Claude Code Guide
Already have servers set up in Claude Desktop? Run claude mcp add-from-claude-desktop (macOS or WSL) to copy them straight into Claude Code instead of re-adding each one by hand.
Adding a Server with claude mcp add
The basic syntax is:
claude mcp add -- [args...] That’s the pattern for a local server, one Claude Code runs itself as a subprocess. Hosted servers reached over a URL use –transport http instead and skip the — command entirely:
claude mcp add --transport http docs-server https://example.com/mcpHosted servers need no Node.js, no local process, and nothing to install. They’re the easiest first server to try. Local servers, like the Postgres example below, need a command Claude Code can actually run on your machine.
For a Postgres database server:
claude mcp add --transport stdio project-db \
  -- npx -y @modelcontextprotocol/server-postgres \
     postgresql://localhost:5432/mydb
Claude Code supports three scopes for server configuration:
| Scope | Config Location | Who Sees It | Best For |
|---|---|---|---|
| Local (default) | ~/.claude.json (per-project) | You only | Personal tools, like GitHub, Slack, your DB |
| Project | .mcp.json in project root | Your whole team (committed) | Shared servers like Linear, Sentry |
| User | ~/.claude.json (top-level mcpServers key) | Only you, all projects | Personal tools you want everywhere, not project-specific |
To verify setup, run:
claude mcp listThe status column tells you exactly what’s happening:
| Status | Meaning |
|---|---|
| ✓ Connected | Ready to use |
| ! Needs authentication | Reachable, but needs a browser sign-in or a token |
| ! Connected · tools fetch failed | Connected, but couldn’t list its tools. Run claude mcp get for detail |
| ✗ Failed to connect | Server didn’t respond. Run the raw command manually to see the real error |
| ✗ Connection error | The connection attempt itself threw an error |
| ⏸ Pending approval | A project-scoped server you haven’t approved yet |
If it shows anything other than “Connected”, run the exact install command manually in your terminal. The error it prints is far more useful than anything in the status line.
The Best MCP Servers to Install First
The MCP ecosystem has over 2,300 public servers in May 2026. Most are abandoned demos. The ones below are actively maintained, production-tested, and cover 80% of real workflows. My honest take: install 3–5 servers maximum to start. Every server adds its tool definitions to Claude’s context window, and a bloated tool list visibly degrades Claude’s tool-selection quality.
| Server | What It Enables | Install Package / Method | Best For |
|---|---|---|---|
| GitHub (Official) | Create issues, review PRs, search code across repos | Docker: ghcr.io/github/github-mcp-server |
All developers |
| Filesystem | Read, search, and organise files on your machine | @modelcontextprotocol/server-filesystem |
Everyone |
| Brave Search | Live web search without rate-limit friction | @modelcontextprotocol/server-brave-search |
Research tasks |
| Postgres | Query and manage your database in plain English | @modelcontextprotocol/server-postgres |
Data / backend teams |
| Notion | Read pages, query databases, update docs from Claude | Official Notion MCP server (OAuth) | Knowledge-heavy teams |
| Slack | Read channels, search history, send messages | @modelcontextprotocol/server-slack |
Team comms + ops |
| Context7 | Up-to-date library docs, solving the stale training data problem | Via npx or Claude Code CLI |
Developers building with APIs |
| Playwright | Browser automation and web testing directly in Claude Code | @playwright/mcp |
QA and frontend engineers |
For developers, the practical starter pack is GitHub + Filesystem + Context7. That combination covers 80% of coding workflows without burning context tokens on unused tools.
Common Errors and Fixes
73% of first-time MCP users hit at least one connection error. Here are the five patterns that account for the vast majority of failures, and the fix for each.
Error 1: Status shows “Failed to connect” or “Connection error”
Both statuses mean the server didn’t start, or an HTTP server’s URL didn’t respond. Run the exact install command manually in your terminal and read the error output directly. The three most common causes: npx not found in PATH (use absolute path), wrong npm package name, or missing environment variable. Fix the underlying error before touching the Claude config.
If it’s a local server timing out on its first run (npx downloading the package for the first time can take a while), raise the startup timeout instead of assuming it’s broken:
MCP_TIMEOUT=60000 claudeError 2: Tools don’t appear after connecting
Use the /mcp slash command inside a Claude Code session to force a reconnect. If tools still don’t appear, run claude mcp get an empty tool list means the server started but declared no tools, usually a server-side config error. Restart with the updated server config.
Error 3: JSON syntax error silently breaks all servers
A single missing comma or mismatched bracket in claude_desktop_config.json silently disables every server. Run your JSON through jsonlint.com or use jq to validate before restarting Claude. This is the single most common first-install failure mode.
Error 4: Relative paths fail
Claude Desktop starts MCP servers with an undefined working directory, so relative paths like ./mydir never resolve. Always use absolute paths: /Users/yourname/projects instead of ~/projects or ./projects.
Error 5: Context window gets eaten by tool definitions
One developer measured 30–40% of their Claude context window going to MCP tool schemas that were never used in that session. If Claude seems unusually slow or expensive, the culprit is almost always too many connected servers. Prune to the 3–5 servers you actually use in your current workflow. You can always add more later.
Hot take: most people who think they need a higher-tier Claude plan actually just need fewer MCP servers loaded. The context cost is invisible but significant. For a comparison of Claude plan features and what they actually unlock
Advanced: Build Your Own MCP Server
Building a custom MCP server is the fastest way to give Claude access to internal tools, proprietary APIs, or data that no public server covers. The Python SDK makes this surprisingly accessible: you define tools with decorators instead of writing JSON schemas by hand.
The minimum viable MCP server in Python:
!pip install mcp

from mcp.server.fastmcp import FastMCP

mcp = FastMCP("my-server")

@mcp.tool()
def get_data(query: str) -> str:
    """Fetch data from my internal API."""
    return my_api.fetch(query)

if __name__ == "__main__":
    mcp.run()
Register it in your Claude Desktop config the same way as any other server point command at your Python interpreter and args at the server file path.
One security note that most tutorials skip: always use scoped permissions when connecting MCP servers. Grant read-only access first, expand to write access only when you have confirmed the server behaves as expected. An MCP server with write access to production systems and a misinterpreted prompt can do real damage.
Conclusion
Connecting MCP servers to Claude turns it into a practical assistant that can work with files, repositories, databases, APIs, and other external tools. Claude Desktop offers simple setup through Extensions or JSON configuration, while Claude Code makes server installation and management easy through the CLI.
The best approach is to start with a few essential servers, use absolute paths, secure your credentials, and grant only the permissions required. Once configured correctly, MCP creates a reliable bridge between Claude and the tools you already use. With that foundation in place, Claude becomes far more capable, useful, and ready for real-world workflows.
Frequently Asked Questions
A. MCP stands for Model Context Protocol. It is an open standard created by Anthropic in November 2024 that lets Claude connect to external tools, databases, files, and APIs through a universal interface. With MCP enabled, Claude moves from answering questions based on training data to taking real actions in connected systems reading files, querying databases, pushing GitHub commits, or sending Slack messages.
A. Claude Desktop reads MCP configuration from claude_desktop_config.json. On macOS, the file is at ~/Library/Application Support/Claude/claude_desktop_config.json. On Windows, it’s at %APPDATA%\Claude\claude_desktop_config.json. Add your server definitions under the mcpServers key using absolute paths, save the file, then fully restart Claude Desktop. Alternatively, use Claude Desktop Extensions (.mcpb files, formerly .dxt) for one-click install of supported servers no JSON editing required.
A. Use the CLI command: claude mcp add
Login to continue reading and enjoy expert-curated content.
