

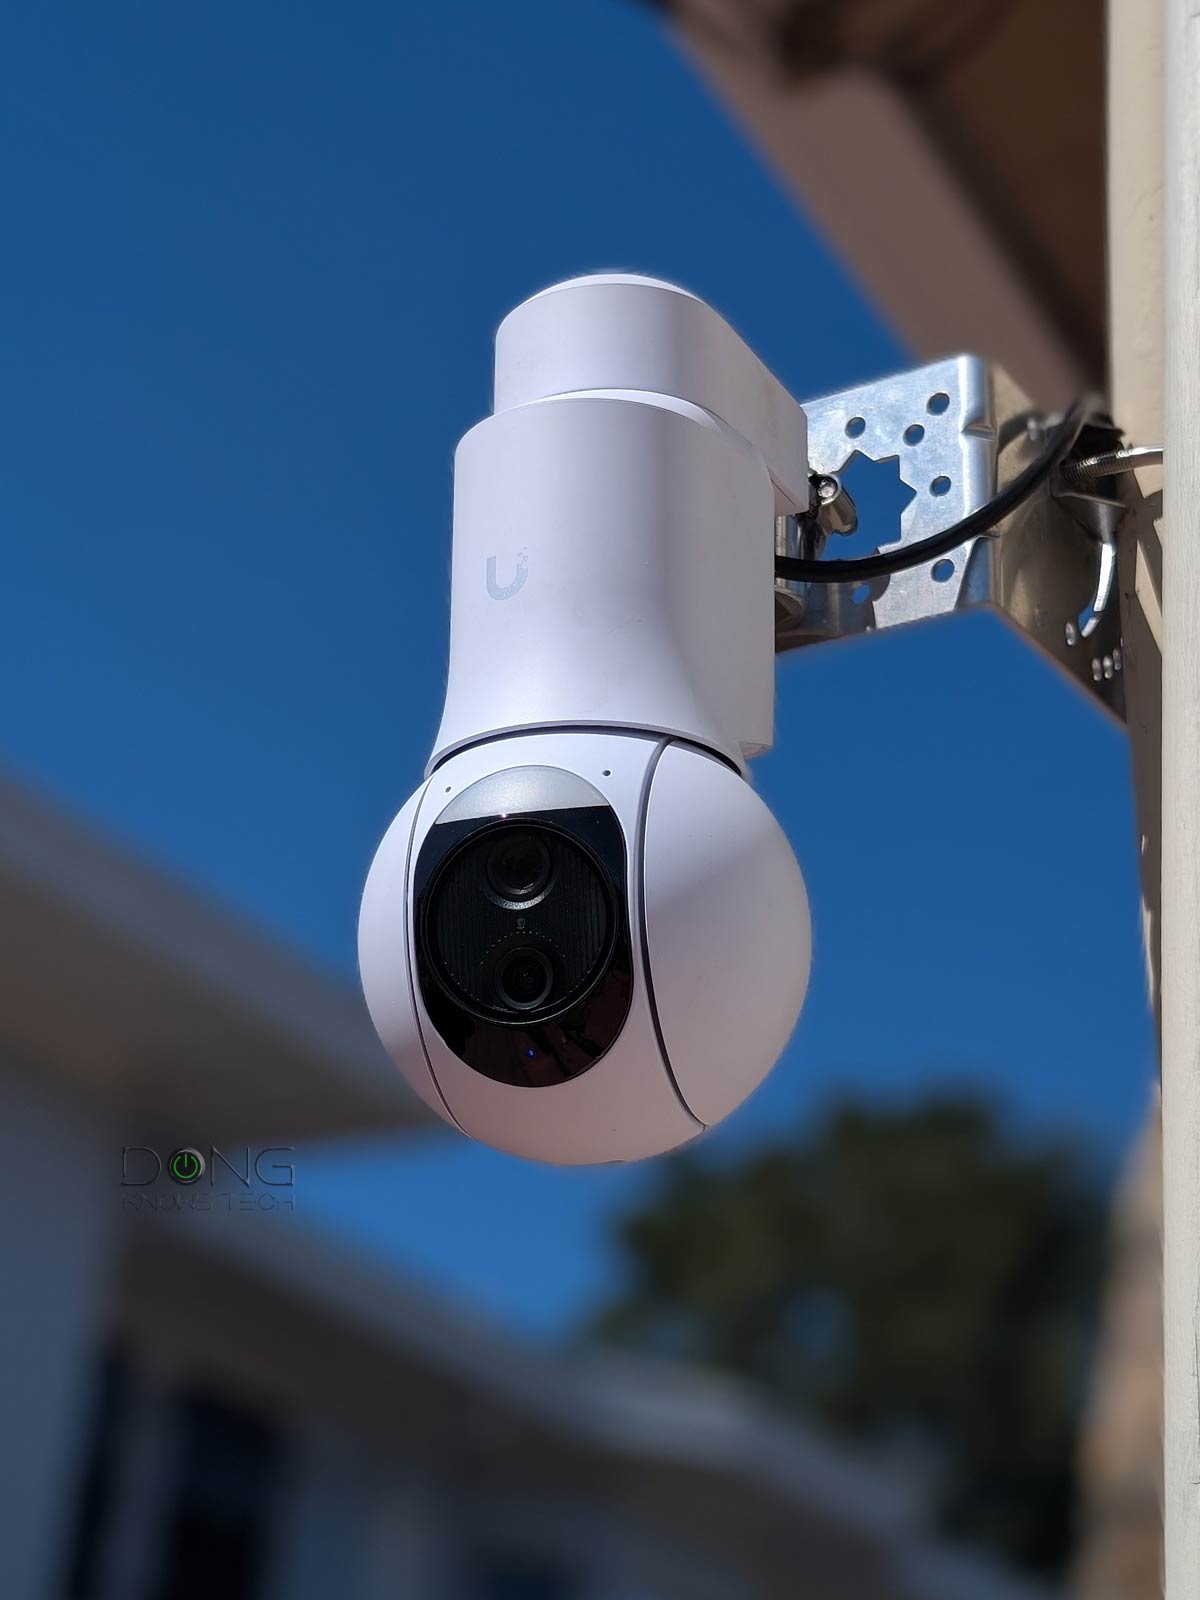

The easiest step to improve home security is to install a camera surveillance system. There are many options on the market. However, most are cloud-connected and require a subscription fee — they are bad for your wallet and privacy, not to mention hindering your Internet bandwidth.
That said, I’d always opt for a locally managed system. And on this front, if you’ve already had a Ubiquiti UniFi Cloud Gateway or are in the process of getting one, you’re in for a pleasant surprise.
Similar to the Surveillance Station app, which is part of Synology’s network-attached storage (NAS) platform, UniFi Protect is an application within the UniFi ecosystem, powered by UniFi OS.
As UniFi Network has become significantly relevant for the masses since the beginning of 2025, UniFi Protect has also proven to be a superb, subscription-free surveillance system for homes and SMBs.
Here’s the bottom line: UniFi Protect surveillance system is so robust and comprehensive that it’s a must-try for those with a UniFi Cloud Gateway as their router. In fact, I’d say you should get a UniFi “router” if you currently have a surveillance system in mind.
Alternatively, those with a non-UniFi network can get a separate UniFi Network Video Recorder (UNVR), such as the UNVR-Instant, to have the same effect.
You’ll learn all about UniFi Protect in this in-depth review and be able to figure out how to start with it on your own when you’re through.
Dong’s note: I first published this piece on September 23, 2025, and last updated it on August 6, 2026, with the latest information on the evolution of the UniFi Protect app.
Pros
Robust and reliable, with lots of advanced surveillance features, yet plug-and-play for the most part
Well-thought-out and responsive web UI and Protect mobile app with excellent recording, monitoring, viewing, sharing, and backup features
Lots of PoE and Wi-Fi camera options, comparatively affordable with no subscription
Excellent hardware design and quality
Cons
No solar-powered battery-operated camera options
Most consumer-grade UNVR can only support a relatively low number of 4K cameras
No easy way (often impossible) to migrate the recording of one UNVR to another; the use of the Protect mobile app requires a UI account

UniFi Protect: An excellent surveillance solution for the home
As part of the UniFi family, the UniFi Protect app has improved significantly since early 2025, when it became relevant to consumers alongside the introduction of a host of home-friendly compact UniFi Cloud Gateways.
In the past couple of years, Ubiquiti has streamlined its product offerings, which include a range of Protect hardware — now part of its Physical Security category — that caters to all budgets and use cases, from simple Wi-Fi-based cameras priced at $99 to advanced 4K AI cameras costing hundreds of dollars each.
These devices are user-friendly while retaining the advanced features and robustness designed for enterprise-class environments.
In any case, it’s worth repeating that Protect is simply one of many applications that run on Ubiquiti’s UniFi OS. So, if you have a Network-enabled UniFi console (a.k.a. UniFi Cloud Gateway) as your network’s primary router, the Protect app is likely already included, whether you’ve elected to use it or not.
UniFi console in a nutshell
A UniFi console is always a container device that runs UniFi OS plus one or more UniFi applications, with Network being the most significant — the primary app.
However, not every UniFi console is equipped with this app. Network-enabled UniFi consoles are called “UniFi Cloud Gateways” (UCGs) and include the UniFi Dream series, such as Dream Machine (UDM) or Dream Wall (UDW) — all of which are UniFi “routers” if you prefer to call them that way.
A few UCGs have just this Network app — they are Network-only UniFi consoles. Most UCGs can host additional applications to qualify as multi-app, Network UniFi consoles.
All UniFi Cloud Gateways (a.k.a. Network-enabled UniFi consoles) share the same basic features and settings. However, their capacities — specifically, the number, breadth, and depth of UniFi applications they can handle simultaneously — vary with hardware specifications.
The following are the current UniFi applications, with the first six belonging to the original UniFi Application Suite:
- Network (primary): This application enables the hardware to function as an advanced router, thereby qualifying it as a “UniFi Cloud Gateway” (UCG). This app handles all network-related aspects, including security, firewalls, access points, Wi-Fi system management, and more. On a UCG, the Network app is the default and can’t be uninstalled.
- Protect: Supports IP cameras as an advanced surveillance system, including a built-in UniFi Network Video Recorder (UNVR) within a UniFi console. Protect is the default app of a standalone UNVR. Generally, a standalone UNVR is a multi-app, non-network console that can also host the Access and InnerSpace applications, but it’s often classified as a “Protect-only UniFi console.”
- Talk: A locally hosted Voice-over-IP system.
- Access: A “platform designed for Access Control Systems” — per Ubiquiti. Examples include door-related security IoT devices such as doorbells, key fobs, and locks.
- Connect: An application that manages digital signage and EV Stations
- InnerSpace: A visualization tool that allows users to map out their UniFi network by uploading floor plans, drawing walls, etc., for deploying UniFi devices.
- Drive: The latest app that turns a UniFi console into a UniFi network-attached storage (NAS) server, known as a UNAS. Generally, a UNAS server is a single-app, non-Network UniFi console — it’s a “Drive-only UniFi console.”
Each of these applications is a world in itself, with various in-depth customizations, and some require UniFi devices to function as intended.
The point is that most modern UniFi “routers” come with a built-in UniFi Network Video Recorder (UNVR), and there are standalone UNVR units for those that don’t or when you use a third-party router.
That said, to use a UniFi Protect security camera system, here are the hardware options:
- A UniFi Cloud Gateway with built-in UNVR capability — the case of most UniFi “routers”. (With these, you can install the Protect app via a single click as shown in the setup guide below). Or
- A standalone UNVR unit to add the feature to an existing network hosted by a router that has no built-in UNVR. Or
- In rare cases, use the CloudKey+ as the UNVR if you’re using a legacy UniFi setup with controllers instead of a UniFi console.
I’ve used the Protect app on multiple UNVR devices, including UDM-SE, UCG-Fiber, UNVR-Instant, UDR7, UDR 5G Max, UDM-Pro-Max, UCG-Industrial, and UDM-Beast.
That said, I’m confident to say that no matter which you end up with, the experience is similar, if not identical, to what I’ll describe below thanks to the consistency of the UniFi ecosystem. As mentioned, the difference between these devices is only their capability, namely the number of cameras they can host and their bandwdith — more on which one you should get in the buying guide section below.
Ubiquiti Protect: A large selection of (proprietary) UniFi cameras and accessories
The UniFi Protect app generally works best with UniFi cameras and accessories.
Conversely, UniFi cameras generally only work with UniFi Protect. While some cameras have their own local web-based interface, allowing them to function to some extent independently, all UniFi cameras are designed to be part of a UniFi NVR.
In other words, UniFi Protect, for the most part, is intended to be a closed proprietary system, similar to many other surveillance solutions. Synology Surveillance Station, for example, offers more in-depth support for third-party cameras, but also provides its own proprietary and semi-proprietary options with significantly enhanced capabilities.
However, if you already have third-party cameras or an existing NVR, chances are you can turn them into part of a UniFi system.
Limited support for third-party options
Indeed, the Protect app does support ONVIF and can host third-party ONVIF-enabled cameras or NVRs.
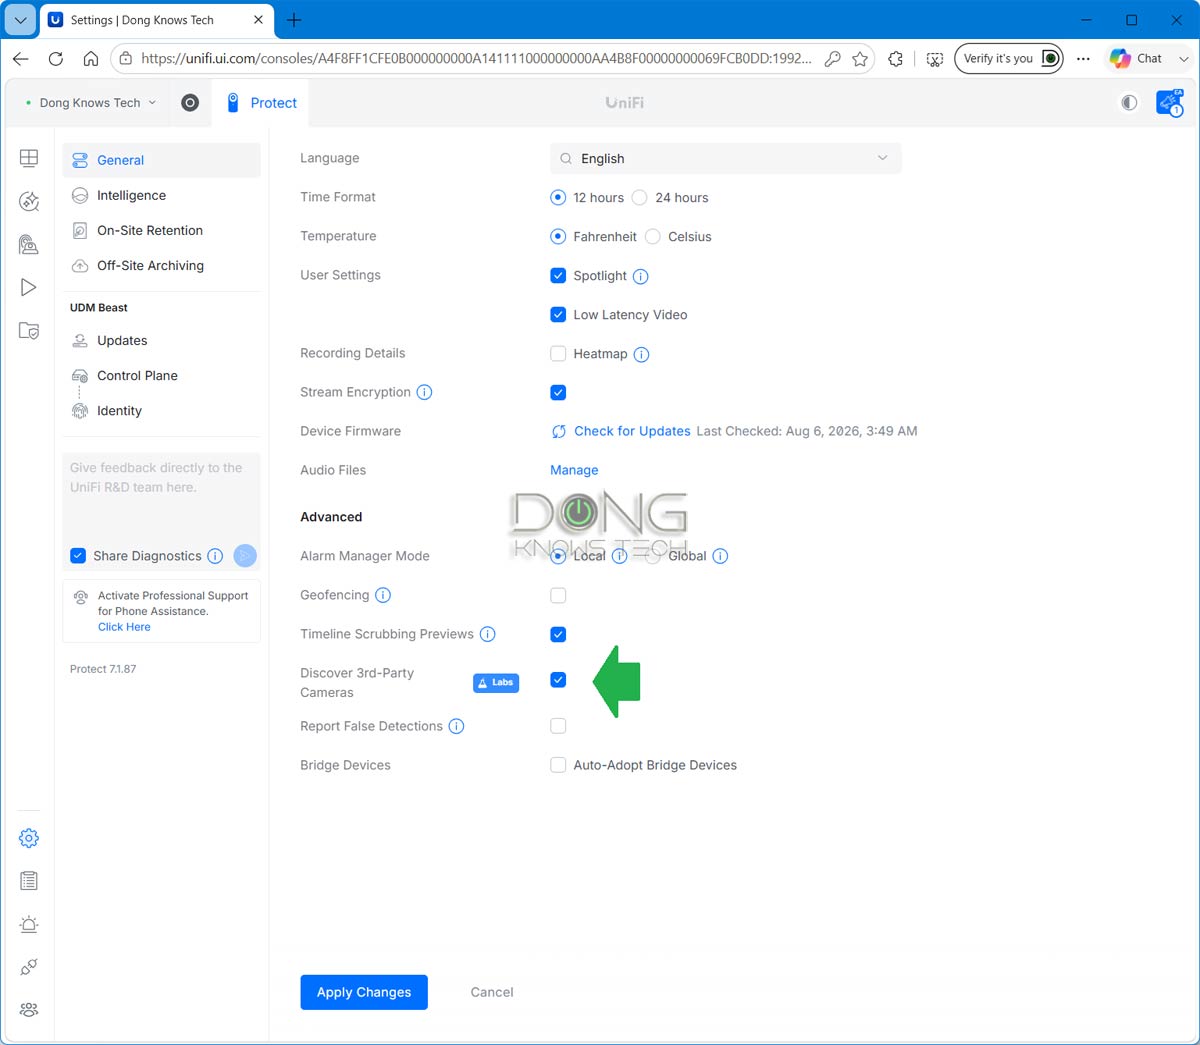
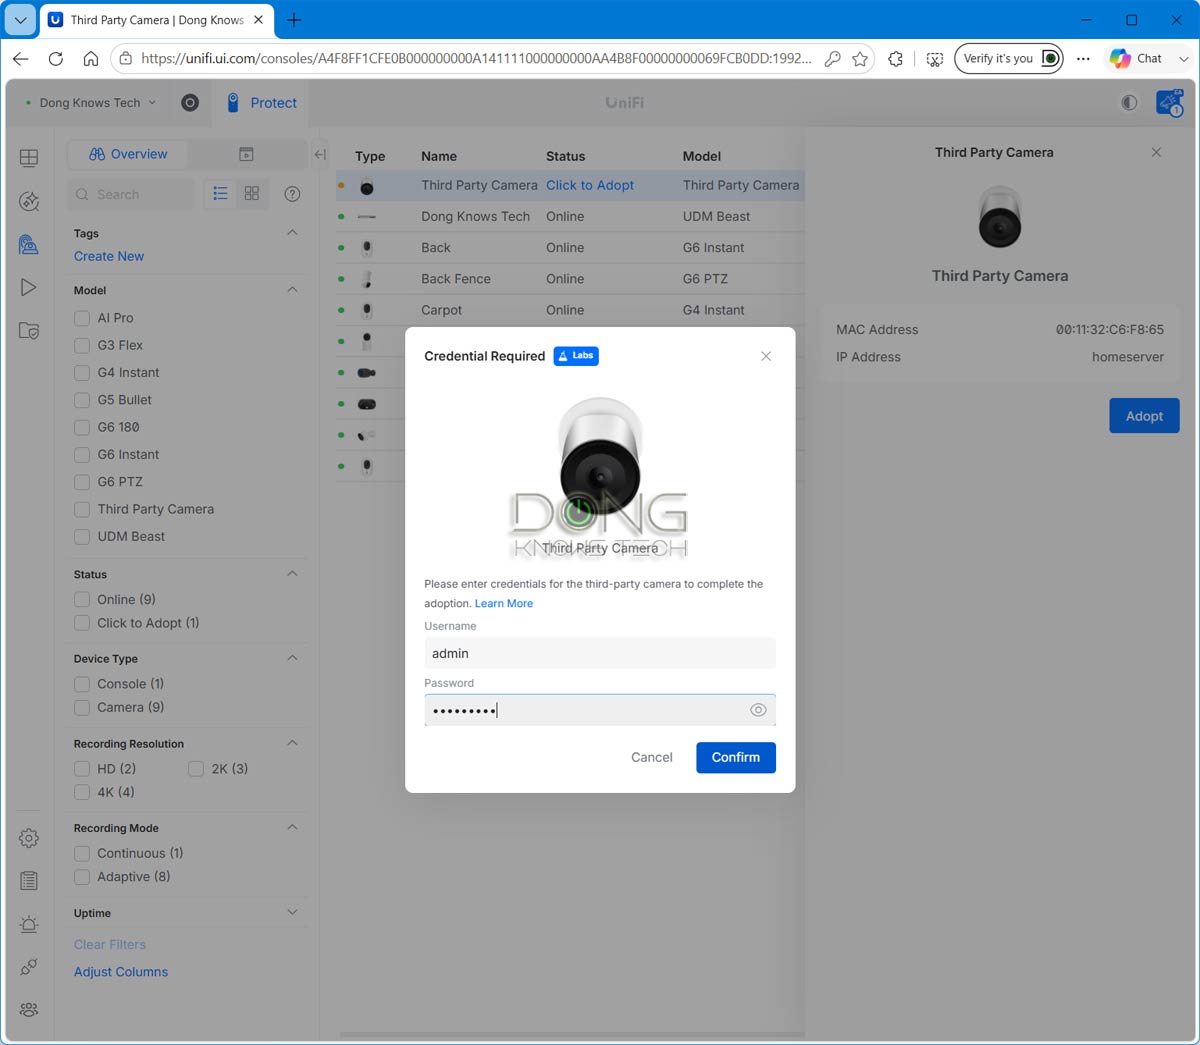
However, in this case, keep the following in mind:
- By default, there’s no option for motion or AI detection recording — you can only choose to record on schedule or continuously.
- To add detection to a third-party camera, you need an additional device: either an AI Port (one per camera) or an AI Key (one per system).
- All standard settings — such as image quality and orientation — must be configured on the camera (or the existing NVR) itself via its web-based user interface and can’t be managed in the UniFi Protect app.
The point is that using third-party cameras will result in a subpar experience, and there will be either no or limited technical support from Ubiquiti. The support for ONVIF is meant for those already having a surveillance system with third-party cameras wanting to transition to UniFi Protect.
Considering the numerous UniFi camera options — and Ubiquiti also plans to add even more in the future — there is little to no reason to use third-party cameras with UniFi Protect when you build a security system from scratch.
UniFi cameras: Series vs. designs
There are many UniFi camera models, but we can group them by series (a.k.a “generation” or “G” for short) and design (shape and features).
In terms of series, current UniFi cameras range from G4 to G6 — G3 and older models have slowly been phased out from the UniFi store but are still supported. The higher the G, the better the cameras are in image quality and features, and the more expensive they become.
This camera is now replaced by the G5 Flex, but it’s still an excellent device if you can still find it.
Starting with the G4 series, specific models (mainly in the Bullet design) also have the slightly more expensive Pro tier with additional advanced features. Specifically, they feature optical zoom, higher image quality, and more advanced night vision capabilities, including floodlights, an extended IR range, and additional features.
After G6, there’s a new “AI” (short for “artificial intelligence”) series that, among other things, features advanced detection capabilities and license plate and facial recognition.
In my experience, even the legacy G3 cameras are already excellent, surpassing many third-party cameras at the same resolution, and are generally sufficient for home surveillance. That said, any camera you buy from the store today will support at least 2K quality and comes with an excellent set of features. Those with the AI features are helpful (and really cool), but not entirely necessary.
That brings us to the design. Currently, there are a few dozen UniFi cameras available in the following design categories:
- Compact: As the name suggests, these are small cameras designed to fit in a tiny spot. They can be Wi-Fi or PoE for indoor or outdoor use cases. This category includes Theta hardware for discreet monitoring.
- Dome and Turret: Standard security cameras in the dome or turret designs. These are often outdoor PoE cameras with resolution up to 4K.
- Bullet: Another type of standard bullet-shaped camera designed for outdoor use. They are all PoE cameras with up to 4K resolution.
- Pan-Tilt-Zoom (PTZ): Advanced outdoor cameras that can automatically move the lens and zoom to follow objects with resolutions between 2K and 4K.
- Doorbells: Camera-integrated doorbells.
In addition to cameras, the UniFi surveillance system provides a range of accessories for enhanced surveillance, including sirens, add-on motion sensors, speakers, floodlights, and more.
There’s one camera type you can’t find yet with UniFi Protect: similar to Synology Surveillance Station, there’s no option for solar-powered cameras with UniFi. As a result, you’ll need to run a network cable for one that’s powered via PoE or have a power outlet ready for a Wi-Fi-enabled one.

UniFi Protect: Simple setup process
As with any UniFi application, you can use Protect locally, independent of Ubiquiti. However, for this surveillance system to work optimally, it’s generally a good idea to link your console to a UI account, which adds considerable convenience, including remote management and access sharing.
Ubiquiti and your privacy
Generally, Ubiquiti insists on a vendor-connected login account during the initial hardware setup process. However, that’s not a requirement, and logging in with a vendor translates to privacy risks.
UI account and UniFi hardware

However, with a UI account, the hardware’s built-in Remote Management and other handy features are conveniently available.
Here’s the link to the US networking company’s privacy policy.
Online privacy and security are a matter of degree. Different companies handle their users’ data differently.
In any case, if you get a standalone UNVR, like the Instant, Protect is already installed. On a multi-app UniFi Cloud Gateway, it’s easy to get Protect up and running, provided you have updated the UniFi OS to the latest version. Here’s how:
- Log in to the UniFi console’s web user interface via its local IP address. If you have linked the hardware to a UI account, you can access the interface at unifi.ui.com.
- Go to Settings (the cogwheel), then pick Updates (if the console currently runs UniFi OS version 4.x, the Updates section is part of the Control Plane). Here, update UniFi OS to the latest available version.
- On the list of supported applications, pick “Install” for the Protect app. (This area also allows you to “Uninstall” an app from the system if you no longer have use for it — you can’t uninstall the default Network app.)
And that’s it. After a few minutes, the app is installed and running, ready to host UniFi cameras.

The next step is to add a camera, which is also straightforward:
- Connect the camera to the network. Two scenarios:
- If it’s a wired camera, connect it to the existing network via PoE. In this case, you can use any PoE switch or injector, including third-party ones (must be unmanaged switches). The camera will get connected and turn on automatically.
- If it’s a Wi-Fi camera, place it within the system’s Wi-Fi coverage and power it on.
- Add the camera to the system. Same scenarios:
- If it’s a wired camera, run the Protect web-based app within the web user interface (or the Protect mobile app on a phone), and the camera will be detected within seconds and ready to be “adopted” by the system.
- If it’s a Wi-Fi camera, generally the Protect mobile app is the best option (especially if you use a non-UniFi access point in the system). In this case, make sure the phone is connected to the system’s Wi-Fi network. Now open the app on your phone and stand next to it with the camera. Within seconds, the camera will be detected via the app or the console’s web user interface, and you can adopt it with a single tap — at most, you’ll be asked to enter the Wi-Fi password as an additional step.
- Click (or tap) the link to adopt the camera, and after a few seconds, it will be added to the Protect system. Repeat steps #1- #3 to add more cameras. The system can detect multiple cameras simultaneously, but you can only add one at a time.
Important: Once a camera is adopted, it will automatically be upgraded to the latest firmware, as has been the case with all cameras in my trial. That said, let the upgrade process finish before unplugging it from the power source.
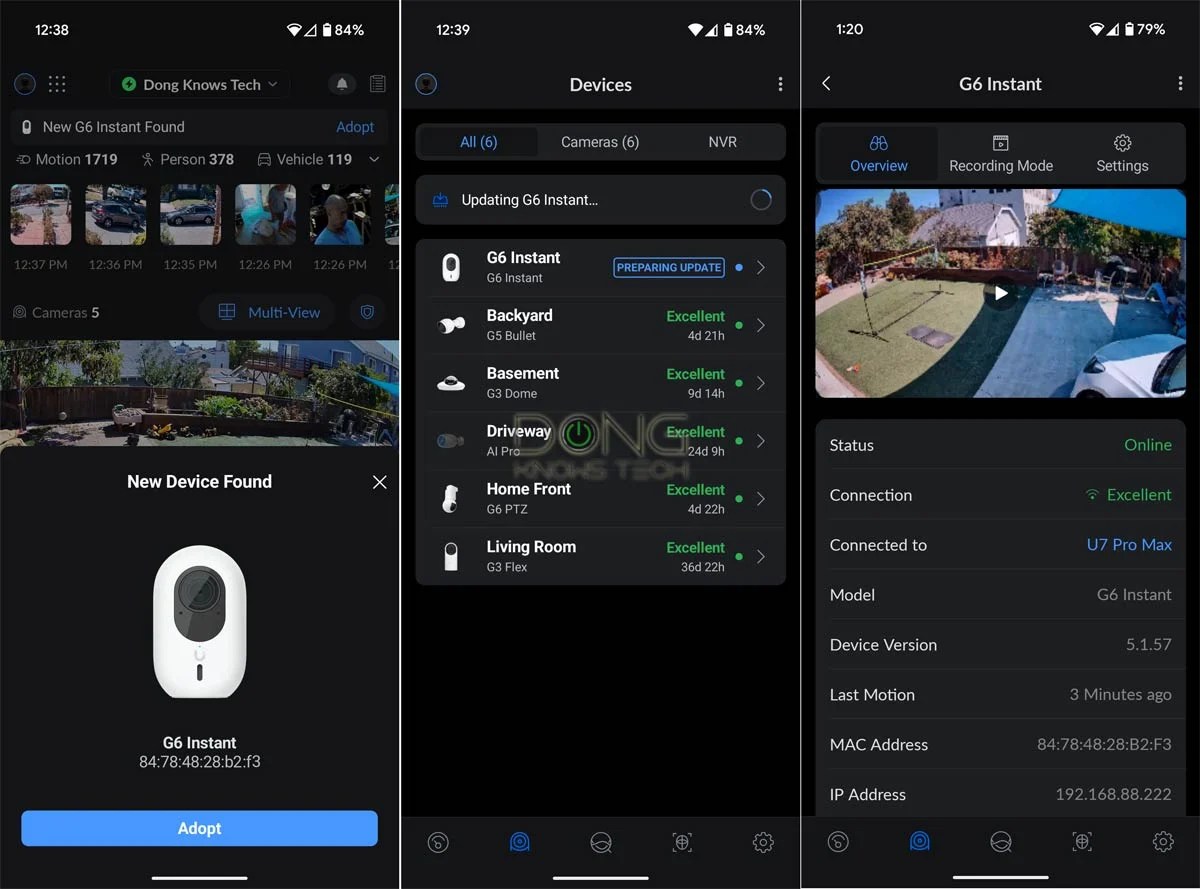
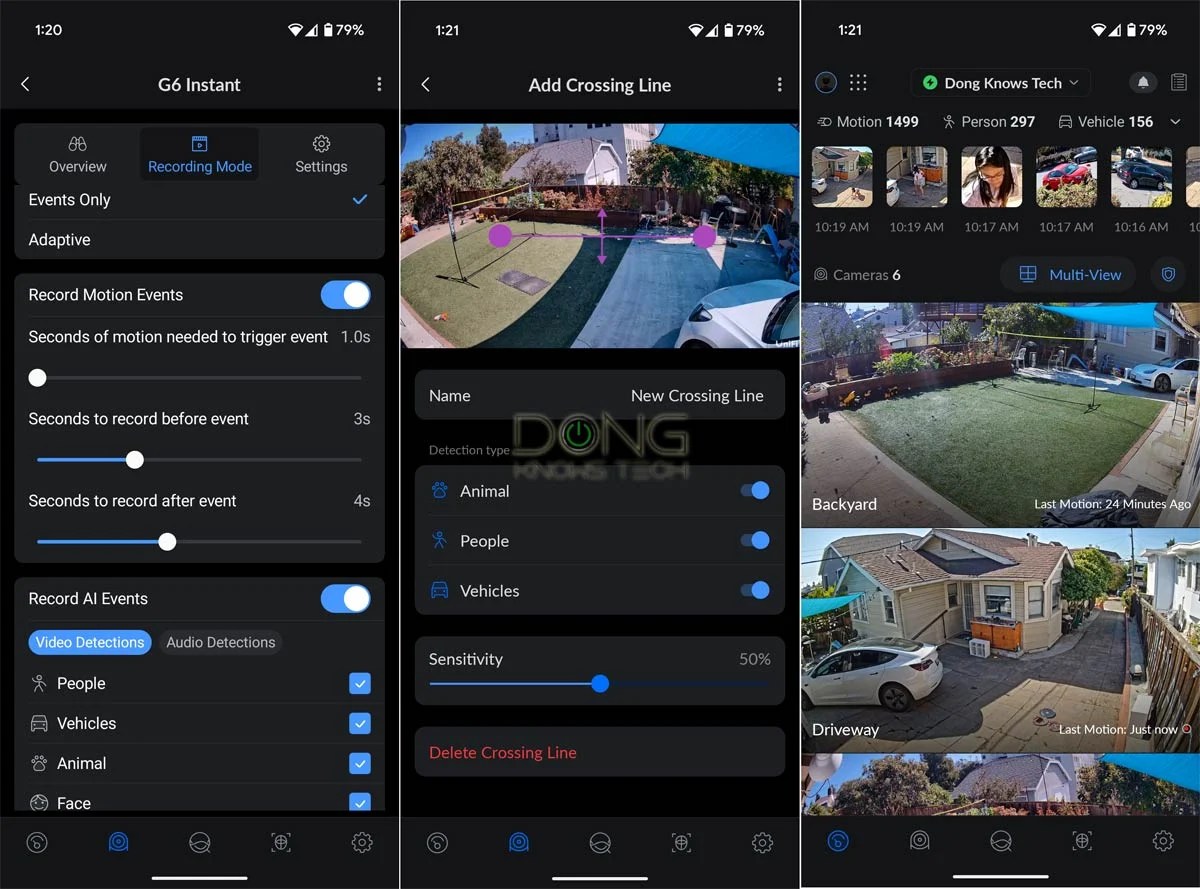
Generally, in addition to the web user interface, you can also use the UniFi mobile app for this setup process and ongoing management. Again, if you want to add a Wi-Fi camera, it’s best to use the Protect app.
Regardless of which one you use, the process is self-explanatory. In my experience, the UniFi Protect app is well-thought-out, responsive, and provides access to the hardware similar to that of the web interface. This app is also more helpful when you need to manage multiple UNVRs in the same network — so far, it’s the only way to move a camera from one UNVR to another.
Still, I prefer the web UI, which is not constrained to a small screen.
UniFi Protect: Lots of options, yet non-intimidating
Designed with enterprise-class applications in mind, UniFi Protect features all the advanced settings and capabilities you can think of for a camera-based surveillance system — some you may not even have heard of. However, the number of available features and settings varies by camera.


For example, if you have a PTZ camera, you can set it to automatically follow a detected object, zoom in on it, and record when a specific type of detection is detected. An AI camera can also do facial and license plate recognition.
The table below shows what each type of UniFi camera can do in terms of its detection capabilities.
| G6 / AI Series | G5 / G4 Series | G3 Cameras (legacy) |
Third-Party Cameras (ONVIF) |
|
| Motion Detection | Yes | w/ AI Port | ||
| Person Detection | Yes | w/ AI Port | w/ AI Port | |
| Face Recognition | Yes (excluding 360 models) |
w/ AI Port | ||
| Clothing Type/Color, Face Enhancement, Gender, Accessories (backpack, etc.) | w/ AI Key | w/ AI Key | w/ AI Key + AI Port | |
| Vehicle Detection | Yes | w/ AI Port | ||
| Vehicle Type, Vehicle Color | Yes | w/ AI Port | ||
| License Plate Recognition (LPR) |
Yes (excluding 360 models) |
w/ AI Port | ||
| Line Crossing | Yes (unavailable on PTZ models) |
w/ AI Port | ||
| Line Cross Counting | Yes (unavailable on PTZ models) |
w/ AI Port | ||
| Audio Recognition (speech, glass break, etc.) |
Yes (microphone-equipped models only) |
w/ AI Port | ||
| Speech-to-Text | w/ AI Key | w/ AI Key + AI Port | ||
| AI-Enhanced Alarms | w/ AI Key | w/ AI Key + AI Port | ||
| Advanced AI Summaries | w/ AI Key | w/ AI Key + AI Port | ||
| Natural Language Search | w/ AI Key | w/ AI Key + AI Port | ||


Keep in mind that the table doesn’t include all that each type of camera can do, far from it. It’s impossible to list everything, but generally, at the bare minimum, you can expect excellent recording, monitoring, and video playback, regardless of which camera you use. After that, here are a few examples of advanced features:
- Flexible storage: For On-Site retention, UniFi Protect supports third-party storage devices (drives) of any capacity. For Off-Site Archiving, users can use a remote or local storage device, such as cloud storage or a NAS server. In the near future, Off-Site recording — recording directly to a third-party source, such as a NAS server or cloud storage — will also be available.
- Multiple users: Admin users of the UniFi system can easily share the Protect app with multiple users by going to Settings -> Admin and adding a new user via their email address, who will need a UniFi account of their own. The sharing can be limited to the entire surveillance system or particular cameras.
- Two-way real-time communication: Via the Protecta app, users can communicate with the detected party via a camera’s built-in speaker and microphone.
- Pre- and post-event recording: In event-based recording mode, the system can automatically keep up to ten extra seconds of footage before and after each detection.
- Edge recording: The camera automatically records to its mini SD card (not included) when the connection to the UNVR becomes unavailable, and it fills the UNVR with recordings when the connection is restored.
- Share live stream: The owner can quickly share each camera’s live feed with a single remote party via a link. There’s also support for the RTSP or RTSPS protocols, allowing for unlimited live streaming to multiple parties or the public.
- Spotlight recording: You select specific items — like a car (by license plate or type), an animal, or certain people (by facial recognition) — and the system focuses on them. For example, a PTZ camera can be set to automatically follow specific objects and prioritize them over others. This feature is enhanced in AI models.
- Find Anything: Users can quickly search recordings by various categories, including people (via facial recognition), vehicle type/color/license plate, audio types (such as speaking, barking, baby crying, and siren), event types, and more. This feature is enhanced in AI models.
- Build Incident Reports with Case Manager: Users can instruct the system to group and annotate relevant footage into structured incident reports for export and sharing.
While the features and capabilities above seem overwhelming, UniFi Protect is user-friendly. That’s because, once a UniFi camera is adopted, the system automatically applies the best settings for it.
The only thing you might want to do is change the default recording mode, set to Always and Continuous, which records 24/7 and can unnecessarily use up storage space. (My preferred setting is Always and Adaptive). After that, you can skip everything else and use the system, knowing it’ll keep an eye on the area effectively.


On the other hand, if you have the time or are curious, you can spend hours experimenting with various settings, regardless of the UniFi cameras you have. The system lets you set common settings for a group or all cameras at once, or you can choose a specific camera and customize it individually to the max.
UniFi Protect: Excellent performance
As mentioned earlier, over the past couple of years, I’ve been using multiple UNVR systems with different hardware (including a UNVR Instant standalone unit as well as half a dozen UniFi Cloud Gateways with a built-in UNVR), alternating between a dozen or so UniFi cameras among them.
In each case, I was thoroughly impressed.
Before this, I had used the Synology Surveillance system for over a decade, which remains an excellent solution today. However, since late 2025, UniFi Protect has decidedly won me over.
Today, I can confidently say that it’s the best surveillance system for general consumers and SMB environments.
Regardless of the particular UNVR I used, the Protect app proved to be reliable and even fun to use both via the web-based user interface and the mobile app. Generally, the interface is fast and responsive. This is particularly true with powerful hardware, such as the UDM-Pro-Max and especially the UDM-Beast.
For example, when the doorbell rings, I can pick up my phone, open the Protect App, and immediately see who’s at the door — the app launches almost instantly and shows the cams with live actions. With other security solutions, such as Arlo or TP-Link Tapo, by the time I can view the camera at the location, the person might have already left.

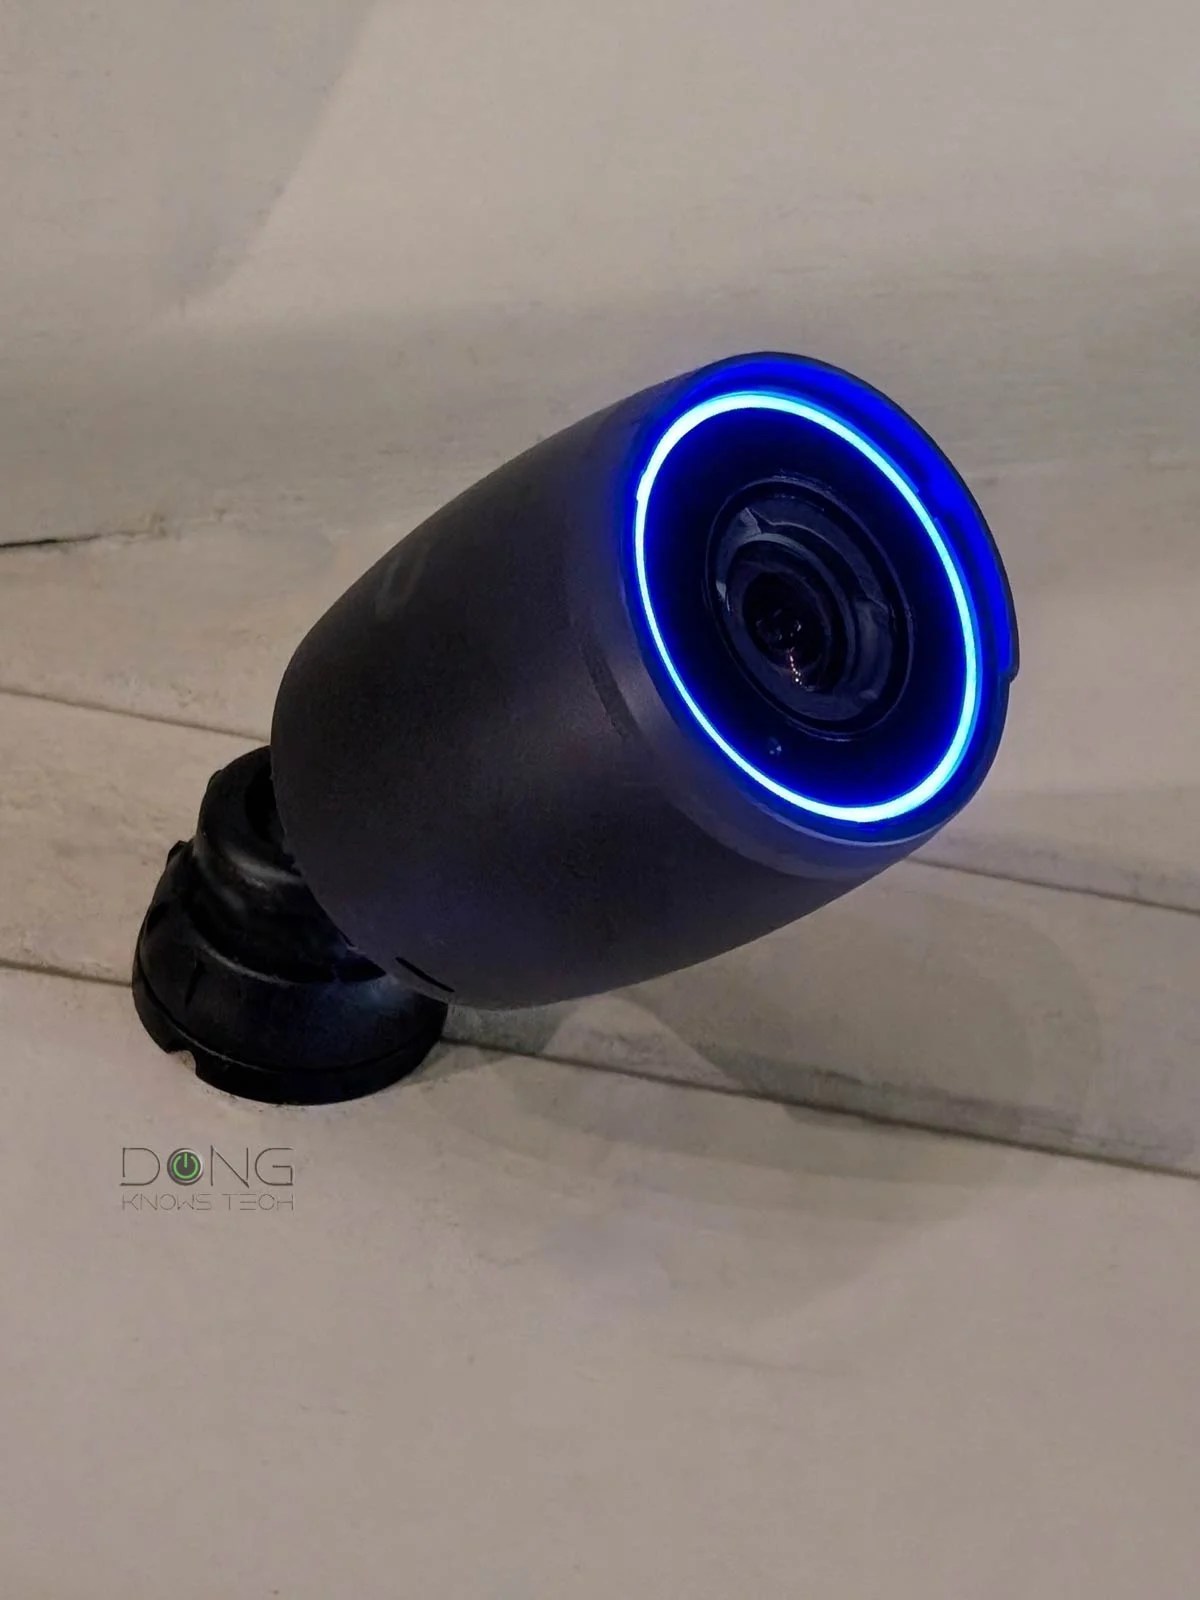
Among other things, the facial recognition feature worked incredibly well when turned on. It creates a profile of repeatedly recognized faces, allowing me to name each one and then set a notification or special action when that face is detected.
This feature is handy in particular situations. For example, you can customize a specific face to receive notifications when certain events occur, such as mail delivery or your kids coming home from school, or, well, keeping tabs on those loitering in the neighborhood.
One of my favorite things to do is to run the Protect app on my iPad (mobile app) or use a second screen (web UI) to view the live feed when I’m in my home office. The app automatically highlights cameras with “actions” and displays a roster of recent events, from which I can view recordings with a single tap or mouse click.
UniFi Protect: A few shortcomings
As mentioned, since the beginning of 2025, UniFi Protect has grown dramatically and improved significantly. However, like all things, it’s not perfect, at least not yet. Here are a few shortcomings that remain in the second half of 2026.
The first issue is the lack of solar-powered camera options. As a result, to use UniFi Protect, you’ll need to either run a network cable (for a PoE camera) or install a new electrical outlet (for a Wi-Fi cam), both of which can be challenging in certain areas. (Ubiquiti has UniFi bridges that can extend the Wi-Fi range a great deal, but they still don’t solve the powering issue.)
The second shortcoming is that there’s no way to seamlessly scale up the number of cameras in a single system once the limit is reached — while you can use more cameras than recommended in a system to an extent, that will cause performance issues.
Specifically, each UNVR can handle only a limited number of cameras, and if you need more, you have two options — neither is ideal:
- Acquire a second UNVR unit to use as a separate system: When multiple UNVRs are used in the same network, you can switch between multiple UNVRs quickly via the Protect app or move cameras between them, but there’s no meaningful connection between separate UNVRs in terms of real-time monitoring, recording, detection, playback, or search.
- Replace your existing UNVR with a higher-capacity one: In this case, keep in mind that there’s no easy way to migrate existing recordings to a replacement UNVR (a standalone unit or one integrated within a more powerful UniFi Cloud Gateway — in many cases, that’s not even possible at all. I detailed this pain in a separate post on UniFi console backup and migration.
Addressing these shortcomings, Ubiquiti told me it would continue to “always explore innovative solutions” and improve the Protect application through future updates.
UniFi Protect: A quick buying guide
As mentioned above, to use a UniFi Protect surveillance system, you need a UNVR. Currently, the UNVR-Instant is the best add-on option for the home, and it’s a good fit for a network running a non-UniFi router.
Alternatively, if you also need a router for your network, it’s better to get a UniFi Cloud Gateway to use its built-in UNVR. The table below shows the current UNVR options (standalone or part of a Network-enabled UniFi console) and the number of cameras each can handle.
| Design | Type (Storage) |
HD Cams (up to) |
2K Cams (up to) |
4K Cams (up to) |
|
| ENVR-Core | Full-scale rackmount (3U) |
Standalone UNVR (16x 2.5/3.5 drive bays) |
500 | 400 | 300 |
| UDM-Beast | Full-scale rackmount (1U) |
Network-enabled UniFi console (2x 2.5/3.5 drive bays) |
100 | 60 | 40 |
| ENVR | Full-scale rackmount (3U) |
Standalone UNVR (16x 2.5/3.5 drive bays) |
210 | 140 | 70 |
| UCG-Industrial | Rugged and compact with various mount options | Network-enabled UniFi console (1x miniSD slot) |
15 | 8 | 5 |
| UDR / UDR7 / UDR 5G Max | Compact desktop | Network-enabled UniFi console (1x miniSD slot) |
5 | 2 | 1 |
| UDM-PRO | Full-scale rackmount (1U) |
Network-enabled UniFi console (1x 2.5/3.5 drive bay) |
24 | 14 | 8 |
| UDM-PRO-MAX | Full-scale rackmount (1U) |
Network-enabled UniFi console (2x 2.5/3.5 drive bays) |
50 | 25 | 15 |
| UDM-SE | Full-scale rackmount (1U) |
Network-enabled UniFi console (1x 2.5/3.5 drive bay) |
24 | 14 | 8 |
| UDW | Wall mount | Network-enabled UniFi console | 12 | 7 | 4 |
| UCG-MAX | Compact (desktop) |
Network-enabled UniFi console (1x NVMe SSD bay) |
15 | 8 | 5 |
| UCG-FIBER | Compact (desktop) |
Network-enabled UniFi console (1x NVMe SSD bay) |
15 | 8 | 5 |
| UCK-G2-PLU | Compact (desktop) |
CloudKey+ (1x SATA SSD) |
24 | 14 | 8 |
| UNVR-G2-Pro | Full-scale rackmount (2U) |
Standalone UNVR (8x 2.5/3.5 drive bays) |
100 | 70 | 50 |
| UNVR-G2 | Full-scale rackmount (1U) |
Standalone UNVR (4x 2.5/3.5 drive bays) |
60 | 50 | 30 |
| UNVR Instant | Compact (desktop) |
Standalone UNVR (1x 3.5 HDD bay) |
15 | 8 | 6 |
| UNVR-PRO | Full-scale rackmount (2U) |
Standalone UNVR (7x 2.5/3.5 drive bays) |
70 | 35 | 24 |
| UNVR | Full-scale rackmount (1U) |
Standalone UNVR (4x 2.5/3.5 drive bays) |
60 | 30 | 14 |
The higher the camera resolution (4K vs. 2K vs. HD), the fewer cameras each UNVR can handle. The exact number depends on the mix. For example, the UCG-Fiber can host a combo of three 4K cameras, two 2K cameras, and two HD cameras for a total of seven. A higher-res (such as 4K) camera can be set to function at a lower-res (such as 2K) to reduce the required resources.
Here are some tips on picking a UniFi Protect recorder:
- Pick the UniFi console that can accommodate the number of cameras you need. Use the number of 4K cameras it can support as the base. Generally, you can trade one 4K camera for two 2K cameras or 3 HD cameras. Note that the resolution is what you set for each camera, and a 4K camera can be set to function at 2K or lower to reduce the required resources.
- If you already have a router you love, a standalone UNVR is a good option. For the home, the UNVR-Instant is an excellent choice.
- If you know you want a dozen or more cameras in the system, it’s best to start with the UDM-Beast if you want to start a network from scratch or get a full-scale rackmount standalone UNVR unit.
- It’s generally not a good idea to use multiple UNVR units in a single home or business unless you want multiple separate surveillance systems for different zones.
If you’re wondering which UNVR-integrated UniFi console to buy among those listed in the table above, below are the regularly updated top five options for the home (and SMBs). After that, use the Capacity Calculator to determine the appropriate number of cameras the hardware can handle.
You can start with one camera and add more over time. In my experience, HD cameras are already sufficient in most cases, and if you’re happy with them, any console/UNVR can host more cameras than you need for your home.
UniFi Protect: Conclusion
Over the years, I’ve used multiple camera-based security systems, including Arlo, Synology Surveillance Station (with various third-party and Synology-branded cameras), and TP-Link Tapo.
They all have pros and cons, but up to mid-2024, Synology’s Surveillance Station offered the best overall experience and didn’t require a subscription either. In fact, for those with a Synology NAS server, it’s still a respectable surveillance solution.
However, if you have a Synology NAS server and a UniFi Protect-enabled UniFi Cloud Gateway as your router, things can get contentious.
By late 2025, after months of using UniFi Protect, I slowly replaced my Synology cameras with UniFi counterparts — one can only mount so many cameras, run so many network cables, and install only a limited number of extra power outlets.
During a few months I used both systems simultaneously, UniFi Protect progressively proved to be far superior in every respect: image quality, features, detection, and real-time performance. Most importantly, Ubiquiti has regularly released updates to noticeably improve UniFi OS and its applications, including Protect.
By the 2nd half of 2026, it’s clear to me that UniFi Protect is now decidedly the best do-it-yourself surveillance that kicks ass in all categories. In fact, if (or maybe when) Ubiquiti offers solar cameras, I’d be happy to ditch Tapo altogether.
Don’t take my word for it! Try UniFi Protect today. If you have a UniFi router, chances are you’re already ready.
